Android实现极简打开摄像头
很多时候忘记Android摄像头如何打开,查看google文档的话,发现太复杂(只是单纯的想打开摄像头而已,不想添加那么多设置,添加那么功能),很多博客也是对官方文档的小修小改,连方法名都一样,因此,我决定完成Android相机最简单的打开摄像头(仅仅打开)。很久没用忘掉的话,打开链接复制粘贴一下就完事了。
AndroidManifest.xml设置CAMERA权限后,在代码中还要设置权限检查,但是因为我连权限检查都懒得加了,装好后直接在手机系统里手动允许权限。
Camera1(已废弃):
xml中使用SurfaceView作为预览View
<?xml version="1.0" encoding="utf-8"?>
<androidx.constraintlayout.widget.ConstraintLayout
? ? xmlns:android="http://schemas.android.com/apk/res/android"
? ? xmlns:app="http://schemas.android.com/apk/res-auto"
? ? xmlns:tools="http://schemas.android.com/tools"
? ? android:layout_width="match_parent"
? ? android:layout_height="match_parent"
? ? tools:context=".MainActivity">

? ? <SurfaceView
? ? ? ? android:id="@+id/surfaceView"
? ? ? ? android:layout_width="0dp"
? ? ? ? android:layout_height="0dp"
? ? ? ? app:layout_constraintBottom_toBottomOf="parent"
? ? ? ? app:layout_constraintLeft_toLeftOf="parent"
? ? ? ? app:layout_constraintRight_toRightOf="parent"
? ? ? ? app:layout_constraintTop_toTopOf="parent" />

</androidx.constraintlayout.widget.ConstraintLayout>
MainActivity:
public class MainActivity extends AppCompatActivity implements SurfaceHolder.Callback{

? ? private SurfaceHolder holder;
? ? private Camera camera;

? ? @Override
? ? protected void onCreate(Bundle savedInstanceState) {
? ? ? ? super.onCreate(savedInstanceState);
? ? ? ? requestWindowFeature(Window.FEATURE_NO_TITLE);
? ? ? ? getWindow().setFlags(WindowManager.LayoutParams.FLAG_FULLSCREEN,
? ? ? ? ? ? ? ? WindowManager.LayoutParams.FLAG_FULLSCREEN);
? ? ? ? setContentView(R.layout.activity_main);
? ? ? ? SurfaceView surfaceView = findViewById(R.id.surfaceView);
? ? ? ? holder = surfaceView.getHolder();
? ? ? ? holder.addCallback(this);
? ? }

? ? @Override
? ? public void surfaceCreated(SurfaceHolder holder) {
? ? ? ? if(camera == null){
? ? ? ? ? ? try {
? ? ? ? ? ? ? ? camera = Camera.open(Camera.CameraInfo.CAMERA_FACING_BACK);
? ? ? ? ? ? ? ? camera.setPreviewDisplay(holder);
? ? ? ? ? ? ? ? camera.startPreview();
? ? ? ? ? ? ? ? Camera.Parameters parameters = camera.getParameters();
? ? ? ? ? ? ? ? parameters.setFocusMode(Camera.Parameters.FOCUS_MODE_AUTO);
? ? ? ? ? ? ? ? parameters.setFlashMode(Camera.Parameters.FLASH_MODE_AUTO);
? ? ? ? ? ? ? ? camera.setParameters(parameters);
? ? ? ? ? ? ? ? camera.setDisplayOrientation(90);
? ? ? ? ? ? }catch (Exception e){
? ? ? ? ? ? ? ? e.printStackTrace();
? ? ? ? ? ? }
? ? ? ? }
? ? }
}
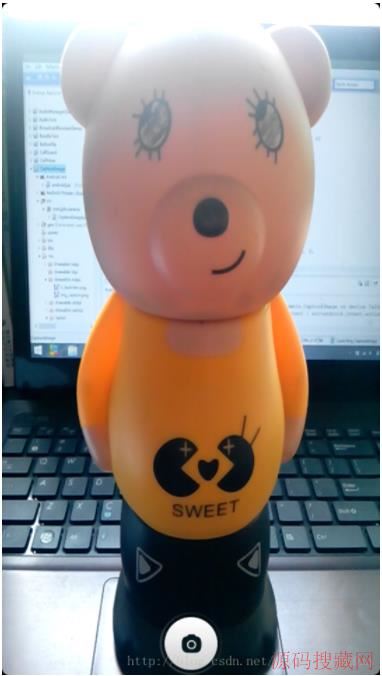
这样就完成了最简单的打开摄像头并在手机中出现画面。(代码里去掉2个接口中未实现的方法)
Camera2
Android 5.0(API 21)以后,谷歌就决定废弃原有的Camera API改用Camera2 API,因为功能更强大

xml使用TextureView作为预览(其实SurfaceView也行,官方的Demo是用TextureView的一个子类):
<?xml version="1.0" encoding="utf-8"?>
<androidx.constraintlayout.widget.ConstraintLayout
? ? xmlns:android="http://schemas.android.com/apk/res/android"
? ? xmlns:app="http://schemas.android.com/apk/res-auto"
? ? xmlns:tools="http://schemas.android.com/tools"
? ? android:layout_width="match_parent"
? ? android:layout_height="match_parent"
? ? tools:context=".MainActivity">

? ? <TextureView
? ? ? ? android:id="@+id/surfaceView"
? ? ? ? android:layout_width="0dp"
? ? ? ? android:layout_height="0dp"
? ? ? ? app:layout_constraintBottom_toBottomOf="parent"
? ? ? ? app:layout_constraintLeft_toLeftOf="parent"
? ? ? ? app:layout_constraintRight_toRightOf="parent"
? ? ? ? app:layout_constraintTop_toTopOf="parent" />

</androidx.constraintlayout.widget.ConstraintLayout>
MainActivity:
public class MainActivity extends AppCompatActivity implements TextureView.SurfaceTextureListener {

? ? private TextureView textureView;

? ? private CaptureRequest.Builder builder;

? ? @Override
? ? protected void onCreate(Bundle savedInstanceState) {
? ? ? ? super.onCreate(savedInstanceState);
? ? ? ? setContentView(R.layout.activity_main);
? ? ? ? textureView = findViewById(R.id.surfaceView);
? ? ? ? textureView.setSurfaceTextureListener(this);
? ? }

? ? @Override
? ? public void onSurfaceTextureAvailable(final SurfaceTexture surface, int width, int height) {
? ? ? ? CameraManager manager = (CameraManager) getSystemService(CAMERA_SERVICE);
? ? ? ? if (ActivityCompat.checkSelfPermission(MainActivity.this, Manifest.permission.CAMERA)
? ? ? ? ? ? ? ? != PackageManager.PERMISSION_GRANTED) {
? ? ? ? ? ? return;
? ? ? ? }
? ? ? ? try {
? ? ? ? ? ? manager.openCamera("0", new CameraDevice.StateCallback() {
? ? ? ? ? ? ? ? @Override
? ? ? ? ? ? ? ? public void onOpened(@NonNull CameraDevice camera) {
? ? ? ? ? ? ? ? ? ? try {
? ? ? ? ? ? ? ? ? ? SurfaceTexture surfaceTexture = textureView.getSurfaceTexture();
? ? ? ? ? ? ? ? ? ? surfaceTexture.setDefaultBufferSize(1440,1080);
? ? ? ? ? ? ? ? ? ? Surface surface = new Surface(surfaceTexture);
? ? ? ? ? ? ? ? ? ? builder = camera.createCaptureRequest(CameraDevice.TEMPLATE_PREVIEW);
? ? ? ? ? ? ? ? ? ? builder.addTarget(surface);

? ? ? ? ? ? ? ? ? ? camera.createCaptureSession(Arrays.asList(surface),
? ? ? ? ? ? ? ? ? ? ? ? ? ? new CameraCaptureSession.StateCallback() {
? ? ? ? ? ? ? ? ? ? ? ? @Override
? ? ? ? ? ? ? ? ? ? ? ? public void onConfigured(@NonNull CameraCaptureSession session) {
? ? ? ? ? ? ? ? ? ? ? ? ? ? try {
? ? ? ? ? ? ? ? ? ? ? ? ? ? ? ? session.setRepeatingRequest(builder.build(), null, null);
? ? ? ? ? ? ? ? ? ? ? ? ? ? } catch (CameraAccessException e) {
? ? ? ? ? ? ? ? ? ? ? ? ? ? ? ? e.printStackTrace();
? ? ? ? ? ? ? ? ? ? ? ? ? ? }
? ? ? ? ? ? ? ? ? ? ? ? }

? ? ? ? ? ? ? ? ? ? ? ? @Override
? ? ? ? ? ? ? ? ? ? ? ? public void onConfigureFailed(@NonNull CameraCaptureSession session) {

? ? ? ? ? ? ? ? ? ? ? ? }
? ? ? ? ? ? ? ? ? ? }, null);
? ? ? ? ? ? ? ? ? ? } catch (CameraAccessException e) {
? ? ? ? ? ? ? ? ? ? ? ? e.printStackTrace();
? ? ? ? ? ? ? ? ? ? }
? ? ? ? ? ? ? ? }

? ? ? ? ? ? ? ? @Override
? ? ? ? ? ? ? ? public void onDisconnected(@NonNull CameraDevice camera) {

? ? ? ? ? ? ? ? }

? ? ? ? ? ? ? ? @Override
? ? ? ? ? ? ? ? public void onError(@NonNull CameraDevice camera, int error) {

? ? ? ? ? ? ? ? }
? ? ? ? ? ? }, null);
? ? ? ? } catch (CameraAccessException e) {
? ? ? ? ? ? e.printStackTrace();
? ? ? ? }
? ? }
}
这样就成功使用Camera2的API打开并预览了(代码里去掉3个接口中未实现的方法)
以上就是本文的全部内容,希望对大家的学习有所帮助,也希望大家多多支持源码搜藏网。
手机开发阅读排行
-

安卓开发复习笔记――Fragment+FragmentTabHost组件(实现新浪微
2016-09-26
-

2014年最新720多套Android源码2.0GB免费一次性打包下载
2016-01-01
-

开源直播系统源码功能一览表(含ios+android+服务端+后台)
2019-10-24
-
2019-09-12
-
2019-09-26
-
2019-09-24
-

直播源码的崛起的巅峰:布谷一对一视频直播的蓬勃发展让您见证了
2019-09-25
-
2019-09-23
最新文章
-

2022-03-29
-
2022-03-29
-
2022-03-29
-

AndriodStudio使用listview实现简单图书管理
2022-03-29
-

2022-03-29
-
AndriodStudio利用ListView和数据库实现简单学生管理
2022-03-29
-
2022-03-29
-
2022-03-29
热门源码
