基于 Android API 26 Platform 源码
写作背景
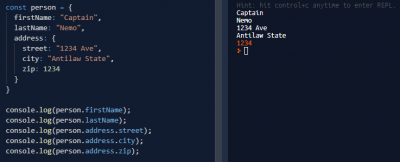
Android 开发框架中,使用 Xml 文件描述 Ui 页面,通过setContentView(resId) 或者LayoutInflater.inflate(resId,……)的方式把 Xml 文件描述的页面转换成 Java 对象。Xml 文件加上 AndroidStudio 提供的预览功能,使得 Android 开发过程中页面和业务逻辑可以并行开发,极大地提高了开发效率。
但是大部分 Android 工程师对 xml 文件如何转换成 Java 不是十分了解,本文将带大家一起探究 View 从 xml 文件到 Java 对象的转换过程
xml 转成成 Java 对象有几种方式?
我们先罗列一下 xml 转换成 Java 对象的方式
1. 在 Activity中调用 setContentView(resId)
2. LayoutInflater.from(context).inflate(resId,……)
跟踪一下 Activity.setContentView(resId)
我们一般在项目使用的 Activity 可能是
1. android.support.v7.app.AppCompatActivity
2. android.support.v4.app.FragmentActivity
3. android.app.Activity
4. 其他 Activity
所有的 Activity 都是 android.app.Activity 的子类。
但是!每个继承 android.app.Activity 的子类 setContentView(resId) 实现方式都被重载了。我们这里先看最基础的 android.app.Activity
public void setContentView(@LayoutRes int layoutResID) {
    getWindow().setContentView(layoutResID);
    initWindowDecorActionBar();
}
查看一下 getWindow()源码
public Window getWindow() {
    return mWindow;
}
全局搜索 mWindow 对象赋值的地方找到以下代码
mWindow = new PhoneWindow(this, window, activityConfigCallback);
这里 PhoneWindow 的源码在 sdk 里面是隐藏的,我们去 androidxref ->PhoneWindow.java 查看 PhoneWindow.setContentView(layoutResID)
@Override
public void setContentView(int layoutResID) {
    // Note: FEATURE_CONTENT_TRANSITIONS may be set in the process of installing the window
    // decor, when theme attributes and the like are crystalized. Do not check the feature
    // before this happens.
    if (mContentParent == null) {
        installDecor();
    } else if (!hasFeature(FEATURE_CONTENT_TRANSITIONS)) {
        mContentParent.removeAllViews();
    }

    if (hasFeature(FEATURE_CONTENT_TRANSITIONS)) {
        final Scene newScene = Scene.getSceneForLayout(mContentParent, layoutResID,
                getContext());
        transitionTo(newScene);
    } else {
        mLayoutInflater.inflate(layoutResID, mContentParent);
    }
    mContentParent.requestApplyInsets();
    final Callback cb = getCallback();
    if (cb != null && !isDestroyed()) {
        cb.onContentChanged();
    }
}
当我们没有设置转场动画的时候会执行
mLayoutInflater.inflate(layoutResID, mContentParent);
在 PhoneWindow 的构造函数中我们找到了 mLayoutInflater 对象赋值语句
public PhoneWindow(Context context) {
    super(context);
    mLayoutInflater = LayoutInflater.from(context);
}
所以我们得出一个结论 Activity.setContentView(resId) 最终还是使用LayoutInflater.from(context).inflate(resId, ……)
再回头看下 android.support.v7.app.AppCompatActivity和android.support.v4.app.FragmentActivity 我们发现 android.support.v4.app.FragmentActivity 没有重载 android.app.Activity.setContentView(resId) 但是 android.support.v7.app.AppCompatActivity重载了
@Override
public void setContentView(@LayoutRes int layoutResID) {
    getDelegate().setContentView(layoutResID);
}
再跟踪一下源代码我们发现最终会调用到 android.support.v7.app.AppCompatDelegateImplV9.setContentView(resId)
@Override
public void setContentView(int resId) {
    ensureSubDecor();
    ViewGroup contentParent = (ViewGroup) mSubDecor.findViewById(android.R.id.content);
    contentParent.removeAllViews();
    LayoutInflater.from(mContext).inflate(resId, contentParent);
    mOriginalWindowCallback.onContentChanged();
}
这里我们又发现了 LayoutInflater 的身影。
这里我们可以总结一下 xml 转成成 Java 对象是通过 LayoutInflater 的 inflate() 方法来完成的
LayoutInflater 对象如何实例化
看下一下 LayoutInflater 的源码第一行
public abstract class LayoutInflater {……}
LayoutInflater 是一个抽象类, 抽象类是不能实例化的

先想一下 LayoutInflater 对象获取的方式
1. 在 Activity 中通过 getLayoutInflater() 获取
2. 通过 LayoutInflater.from(context) 获取
3.context.getSystemService(Context.LAYOUT_INFLATER_SERVICE) 获取
看 Activity 的 getLayoutInflater()
public LayoutInflater getLayoutInflater() {
    return getWindow().getLayoutInflater();
}
这里我们就可以看出 Activity 通过 getLayoutInflater() 获取的是 PhoneWindow 的 mLayoutInflater (如果忘记了可以往上翻一下,或者去参考资料的链接里找找源码)
再看一下 LayoutInflater.from(context)
public static LayoutInflater from(Context context) {
    LayoutInflater LayoutInflater =
            (LayoutInflater) context.getSystemService(Context.LAYOUT_INFLATER_SERVICE);
    if (LayoutInflater == null) {
        throw new AssertionError("LayoutInflater not found.");
    }
    return LayoutInflater;
}
此时,我们必须请出柯南君帮我们宣布

真相只有一个!最终都是通过服务获取 LayoutInflater 实例对象
下一步,源码追踪context.getSystemService(Context.LAYOUT_INFLATER_SERVICE)
这里先说明一个前提,context 的实现类是 ContextImpl
如果对该前提有疑问请移步 Android Context完全解析,你所不知道的Context的各种细节
所以我们直接查看 ContextImpl.getSystemService(Context.LAYOUT_INFLATER_SERVICE)
@Override
public Object getSystemService(String name) {
    return SystemServiceRegistry.getSystemService(this, name);
}
继续跟踪 SystemServiceRegistry
public static Object getSystemService(ContextImpl ctx, String name) {
    ServiceFetcher<?> fetcher = SYSTEM_SERVICE_FETCHERS.get(name);
    return fetcher != null ? fetcher.getService(ctx) : null;
}
这时候我们在 SystemServiceRegistry 类停留一下,发现这里似乎只注册各种系统服务的地方。我们找到了 Context.LAYOUT_INFLATER_SERVICE 注册代码。
static {
     ……
     registerService(Context.LAYOUT_INFLATER_SERVICE, LayoutInflater.class,
             new CachedServiceFetcher<LayoutInflater>() {
         @Override
          public LayoutInflater createService(ContextImpl ctx) {
             return new PhoneLayoutInflater(ctx.getOuterContext());
         }});
     ……
 }

 private static <T> void registerService(String serviceName, Class<T> serviceClass,
         ServiceFetcher<T> serviceFetcher) {
     SYSTEM_SERVICE_NAMES.put(serviceClass, serviceName);
     SYSTEM_SERVICE_FETCHERS.put(serviceName, serviceFetcher);
 }
然后我们终于找到 LayoutInflater 的实现类是 PhoneLayoutInflater
此时我们可以休息一下,喝口水,上个卫生间,进入下个阶段
LayoutInflater 读取 xml 文件并创建 View 对象
LayoutInflater.inflate()
public View inflate(@LayoutRes int resource, @Nullable ViewGroup root)
public View inflate(@LayoutRes int resource, @Nullable ViewGroup root, boolean attachToRoot)
再去源码查看一下,发现两个方法其实只有一个方法是核心,另一个只是做了一下封装,让我们少传入一个参数。
public View inflate(@LayoutRes int resource, @Nullable ViewGroup root) {
    return inflate(resource, root, root != null);
}
所以我们重点看一下 inflate(@LayoutRes int resource, @Nullable ViewGroup root, boolean attachToRoot) 的源码
public View inflate(@LayoutRes int resource, @Nullable ViewGroup root, boolean attachToRoot) {
    final Resources res = getContext().getResources();
    if (DEBUG) {
        Log.d(TAG, "INFLATING from resource: \"" + res.getResourceName(resource) + "\" ("
                + Integer.toHexString(resource) + ")");
    }

    final XmlResourceParser parser = res.getLayout(resource);
    try {
        return inflate(parser, root, attachToRoot);
    } finally {
        parser.close();
    }
}
我们看到首先通过 res 对象把 resId 指向的 xml 文件转换为 XmlResourceParser 然后执行 inflate(parser, root, attachToRoot) 方法,该方法比较长,这里只贴出核心步骤。
public View inflate(XmlPullParser parser, @Nullable ViewGroup root, boolean attachToRoot) {
    synchronized (mConstructorArgs) {

        final Context inflaterContext = mContext;
        final AttributeSet attrs = Xml.asAttributeSet(parser);
        Context lastContext = (Context) mConstructorArgs[0];
        mConstructorArgs[0] = inflaterContext;
        View result = root;

        try {
            ……

            if (TAG_MERGE.equals(name)) {
                if (root == null || !attachToRoot) {
                    throw new InflateException("<merge /> can be used only with a valid "
                            + "ViewGroup root and attachToRoot=true");
                }

                rInflate(parser, root, inflaterContext, attrs, false);
            } else {
                // Temp is the root view that was found in the xml
                final View temp = createViewFromTag(root, name, inflaterContext, attrs);

                ViewGroup.LayoutParams params = null;

                if (root != null) {
                    ……
                    // Create layout params that match root, if supplied
                    params = root.generateLayoutParams(attrs);
                    if (!attachToRoot) {
                        // Set the layout params for temp if we are not
                        // attaching. (If we are, we use addView, below)
                        temp.setLayoutParams(params);
                    }
                }
                ……

                // Inflate all children under temp against its context.
                rInflateChildren(parser, temp, attrs, true);

                // We are supposed to attach all the views we found (int temp)
                // to root. Do that now.
                if (root != null && attachToRoot) {
                    root.addView(temp, params);
                }

                // Decide whether to return the root that was passed in or the
                // top view found in xml.
                if (root == null || !attachToRoot) {
                    result = temp;
                }
            }

        } ……
          省略异常处理部分
          ……

        return result;
    }
}
以上步骤还是很长,我们将拆分几部分分析。
第一部分
    if (TAG_MERGE.equals(name)) {
        if (root == null || !attachToRoot) {
            throw new InflateException("<merge /> can be used only with a valid "
                    + "ViewGroup root and attachToRoot=true");
        }

        rInflate(parser, root, inflaterContext, attrs, false);
    }
如果 xml 根标签是 merge,则 root 不能为空, attachToRoot 必须是 true。
然后执行 rInflate(parser, root, inflaterContext, attrs, false)
void rInflate(XmlPullParser parser, View parent, Context context,
        AttributeSet attrs, boolean finishInflate) throws XmlPullParserException, IOException {

    final int depth = parser.getDepth();
    int type;
    boolean pendingRequestFocus = false;

    while (((type = parser.next()) != XmlPullParser.END_TAG ||
            parser.getDepth() > depth) && type != XmlPullParser.END_DOCUMENT) {

        if (type != XmlPullParser.START_TAG) {
            continue;
        }

        final String name = parser.getName();

        if (TAG_REQUEST_FOCUS.equals(name)) {
            pendingRequestFocus = true;
            consumeChildElements(parser);
        } else if (TAG_TAG.equals(name)) {
            parseViewTag(parser, parent, attrs);
        } else if (TAG_INCLUDE.equals(name)) {
            if (parser.getDepth() == 0) {
                throw new InflateException("<include /> cannot be the root element");
            }
            parseInclude(parser, context, parent, attrs);
        } else if (TAG_MERGE.equals(name)) {
            throw new InflateException("<merge /> must be the root element");
        } else {
            final View view = createViewFromTag(parent, name, context, attrs);
            final ViewGroup viewGroup = (ViewGroup) parent;
            final ViewGroup.LayoutParams params = viewGroup.generateLayoutParams(attrs);
            rInflateChildren(parser, view, attrs, true);
            viewGroup.addView(view, params);
        }
    }

    if (pendingRequestFocus) {
        parent.restoreDefaultFocus();
    }

    if (finishInflate) {
        parent.onFinishInflate();
    }
}
上面这个方式我们需要重点记一下
1. 遍历该节点的子节点
2. 子节点有 "requestFocus"、"tag"、""、"include"
3. 子节点不能是 "merge"
4. 子节点的其他情况,则是各种 View 的标签
5. View 标签和  "include" 标签会创建 View 对象
6. 遍历结束以后执行 parent.onFinishInflate()
如果子节点是 include 则执行 parseInclude() ,parseInclude() 的源码和 inflate(parser, root, attachToRoot) 类似,都是读取xml对应的文件,转换成 XmlResourceParser 然后遍历里的标签
经过层层调用,我们可以找到最终创建 View 的代码在
   final View view = createViewFromTag(parent, name, context, attrs);
   final ViewGroup viewGroup = (ViewGroup) parent;
   final ViewGroup.LayoutParams params = viewGroup.generateLayoutParams(attrs);
   rInflateChildren(parser, view, attrs, true);
   viewGroup.addView(view, params);
第一部分代码,我们的到的结论是, createViewFromTag(parent, name, context, attrs)负责创建 View 对象
第二部分
  // Temp is the root view that was found in the xml
   final View temp = createViewFromTag(root, name, inflaterContext, attrs);

   ViewGroup.LayoutParams params = null;

   if (root != null) {
       ……
       // Create layout params that match root, if supplied
       params = root.generateLayoutParams(attrs);
       if (!attachToRoot) {
           // Set the layout params for temp if we are not
           // attaching. (If we are, we use addView, below)
           temp.setLayoutParams(params);
       }
   }
   ……

   // Inflate all children under temp against its context.
   rInflateChildren(parser, temp, attrs, true);

   // We are supposed to attach all the views we found (int temp)
   // to root. Do that now.
   if (root != null && attachToRoot) {
       root.addView(temp, params);
   }

   // Decide whether to return the root that was passed in or the
   // top view found in xml.
   if (root == null || !attachToRoot) {
       result = temp;
   }
因为这里排除了merge标签,这里的根标签肯定是一个 View,所以调用了 createViewFromTag(root, name, inflaterContext, attrs) 方法创建 View 。再次印证了第一部分得出的结论 createViewFromTag(parent, name, context, attrs)负责创建 View 对象
然后看下后面的代码我们就明白 inflate(@LayoutRes int resource, @Nullable ViewGroup root, boolean attachToRoot) 三个参数的关系了
1. root 不为 null 的时候,才会读取 xml 跟布局的 params 属性。
   (这里可以解释为啥我们有时候用 LayoutInflater 加载的 xml 根标签的属性总是无效 )
2. attachToRoot 为 True ,返回的是  root 对象。否则返回的是 xml 创建的根标签指定的 View
LayoutInflater.createViewFromTag()创建 View 对象
通过上面的判断我们终于找到了最最核心的方法 createViewFromTag()
private View createViewFromTag(View parent, String name, Context context, AttributeSet attrs) {
    return createViewFromTag(parent, name, context, attrs, false);
}
有包裹了一层,并且把 ignoreThemeAttr 设置为 false,表示这里会收到 Theme 的影响。我们在 createViewFromTag(parent, name, context, attrs, false) 中找到了创建 View 的代码
  View view;
  if (mFactory2 != null) {
      view = mFactory2.onCreateView(parent, name, context, attrs);
  } else if (mFactory != null) {
      view = mFactory.onCreateView(name, context, attrs);
  } else {
      view = null;
  }

  if (view == null && mPrivateFactory != null) {
      view = mPrivateFactory.onCreateView(parent, name, context, attrs);
  }

  if (view == null) {
      final Object lastContext = mConstructorArgs[0];
      mConstructorArgs[0] = context;
      try {
          if (-1 == name.indexOf('.')) {
              view = onCreateView(parent, name, attrs);
          } else {
              view = createView(name, null, attrs);
          }
      } finally {
          mConstructorArgs[0] = lastContext;
      }
  }

  return view;
这里又出现了 mFactory2、mFactory、mPrivateFactory 三个对象,似乎都是可以创建 View 。 对于android.app.Activity来说,这三个对象为 null 或者空实现(下一节会讲这个) 所以我们直接看
 final Object lastContext = mConstructorArgs[0];
 mConstructorArgs[0] = context;
 try {
     if (-1 == name.indexOf('.')) {
         view = onCreateView(parent, name, attrs);
     } else {
         view = createView(name, null, attrs);
     }
 } finally {
     mConstructorArgs[0] = lastContext;
 }
这里需要说明一下,如果 name属性里面含有 . 表示这是一个自定义 View,系统自带 View 我们可以省略类的路径,而自定义 View 则不能省略。
对于自定义 View 的创建,这里省略了大部分代码
public final View createView(String name, String prefix, AttributeSet attrs)
        throws ClassNotFoundException, InflateException {
    Constructor<? extends View> constructor = sConstructorMap.get(name);
    ……
    try {

        final View view = constructor.newInstance(args);
        if (view instanceof ViewStub) {
            // Use the same context when inflating ViewStub later.
            final ViewStub viewStub = (ViewStub) view;
            viewStub.setLayoutInflater(cloneInContext((Context) args[0]));
        }
        mConstructorArgs[0] = lastContext;
        return view;

    } ……
}
仅仅看到 constructor.newInstance(args) 我们已经明白这里使用了 反射创建 View 对象
而对于 Android 内置的各种 View 我们在 LayoutInflater 的实现类 PhoneLayoutInflater 中找到了重载
/**
 * @hide
 */
public class PhoneLayoutInflater extends LayoutInflater {
    private static final String[] sClassPrefixList = {
        "android.widget.",
        "android.webkit.",
        "android.app."
    };

    @Override protected View onCreateView(String name, AttributeSet attrs) throws ClassNotFoundException {
        for (String prefix : sClassPrefixList) {
            try {
                View view = createView(name, prefix, attrs);
                if (view != null) {
                    return view;
                }
            } catch (ClassNotFoundException e) {
                // In this case we want to let the base class take a crack
                // at it.
            }
        }

        return super.onCreateView(name, attrs);
    }
}
再看下 LayoutInflater 中的代码
protected View onCreateView(View parent, String name, AttributeSet attrs)
        throws ClassNotFoundException {
    return onCreateView(name, attrs);
}

protected View onCreateView(String name, AttributeSet attrs)
        throws ClassNotFoundException {
    return createView(name, "android.view.", attrs);
}
我们可以看到, 对于系统内置的 View,会依次在 View 的标签前面加上"android.widget."、"android.webkit.","android.app." 、"android.view." 然后通过反射的方法创建 View。
最后补充一点,Activity 和 mFactory2、mFactory、mPrivateFactory 的关系
我们前面说过 对于android.app.Activity来说,mFactory2、mFactory、mPrivateFactory这三个对象为 null或者空实现
我们回到 Activity 的源码中
final void attach(……) {
    ……

    mWindow = new PhoneWindow(this, window, activityConfigCallback);
    mWindow.setWindowControllerCallback(this);
    mWindow.setCallback(this);
    mWindow.setOnWindowDismissedCallback(this);
    mWindow.getLayoutInflater().setPrivateFactory(this);
    ……
}
这里省略了很多代码,但是我们看到在创建完 PhoneWindow 以后,紧接着调用了mWindow.getLayoutInflater().setPrivateFactory(this)
这里看到 Activity 实现了 LayoutInflater.Factory2 接口,并且通过mWindow.getLayoutInflater().setPrivateFactory(this),把 Activity 设置为 LayoutInflater 的 mPrivateFactory 成员变量。
public View onCreateView(View parent, String name, Context context, AttributeSet attrs) {
    if (!"fragment".equals(name)) {
        return onCreateView(name, context, attrs);
    }

    return mFragments.onCreateView(parent, name, context, attrs);
}

@Nullable
public View onCreateView(String name, Context context, AttributeSet attrs) {
    return null;
}
这里可以看到 Activity 通过自己的实现的 LayoutInflater.Factory2 接口,增加了对fragment标签的处理。
顺便说一下 AppCompat 组件的安装
android.support.v7 包中提供了一系列 AppCompatXXX 替代Android自带的 XXX 。例如 android.view.View 被替代为android.support.v7.widget
第一步 AppCompatActivity.onCreate(@Nullable Bundle savedInstanceState)
@Override
protected void onCreate(@Nullable Bundle savedInstanceState) {
    final AppCompatDelegate delegate = getDelegate();
    delegate.installViewFactory();
    delegate.onCreate(savedInstanceState);
    ……
    super.onCreate(savedInstanceState);
}
这里可以看到 delegate.installViewFactory(),该方法的实现类在 android.support.v7.app.AppCompatDelegateImplV9
@Override
public void installViewFactory() {
    LayoutInflater layoutInflater = LayoutInflater.from(mContext);
    if (layoutInflater.getFactory() == null) {
        LayoutInflaterCompat.setFactory2(layoutInflater, this);
    } else {
        if (!(layoutInflater.getFactory2() instanceof AppCompatDelegateImplV9)) {
            Log.i(TAG, "The Activity's LayoutInflater already has a Factory installed"
                    + " so we can not install AppCompat's");
        }
    }
}
这里看到 LayoutInflaterCompat.setFactory2(layoutInflater, this) ,跟踪下去
public static void setFactory2(
        @NonNull LayoutInflater inflater, @NonNull LayoutInflater.Factory2 factory) {
    IMPL.setFactory2(inflater, factory);
}
public void setFactory2(LayoutInflater inflater, LayoutInflater.Factory2 factory) {
        inflater.setFactory2(factory);

        final LayoutInflater.Factory f = inflater.getFactory();
        if (f instanceof LayoutInflater.Factory2) {
            // The merged factory is now set to getFactory(), but not getFactory2() (pre-v21).
            // We will now try and force set the merged factory to mFactory2
            forceSetFactory2(inflater, (LayoutInflater.Factory2) f);
        } else {
            // Else, we will force set the original wrapped Factory2
            forceSetFactory2(inflater, factory);
        }
    }
这里看到 inflater.setFactory2(factory) ,表示已经安装 AppCompatDelegateImplV9 到 LayoutInflater.mFactory2
然后看 `AppCompatDelegateImplV9.(View parent, final String name, @NonNull Context context,
        @NonNull AttributeSet attrs)`

@Override
public View createView(View parent, final String name, @NonNull Context context, @NonNull AttributeSet attrs) {
    if (mAppCompatViewInflater == null) {
        mAppCompatViewInflater = new AppCompatViewInflater();
    }

    boolean inheritContext = false;
    if (IS_PRE_LOLLIPOP) {
        inheritContext = (attrs instanceof XmlPullParser)
                // If we have a XmlPullParser, we can detect where we are in the layout
                ? ((XmlPullParser) attrs).getDepth() > 1
                // Otherwise we have to use the old heuristic
                : shouldInheritContext((ViewParent) parent);
    }

    return mAppCompatViewInflater.createView(parent, name, context, attrs, inheritContext,
            IS_PRE_LOLLIPOP, /* Only read android:theme pre-L (L+ handles this anyway) */
            true, /* Read read app:theme as a fallback at all times for legacy reasons */
            VectorEnabledTintResources.shouldBeUsed() /* Only tint wrap the context if enabled */
    );
}
最后到 `AppCompatViewInflater.createView(View parent, final String name, @NonNull Context context,
        @NonNull AttributeSet attrs, boolean inheritContext,
        boolean readAndroidTheme, boolean readAppTheme, boolean wrapContext)`

public final View createView(……) {
    ……
    // We need to 'inject' our tint aware Views in place of the standard framework versions
    switch (name) {
        case "TextView":
            view = new AppCompatTextView(context, attrs);
            break;
        ……
    }

    if (view == null && originalContext != context) {
        ……
        view = createViewFromTag(context, name, attrs);
    }

    if (view != null) {
        // If we have created a view, check its android:onClick
        checkOnClickListener(view, attrs);
    }

    return view;
}
到此 ,Xml 文件到 View 对象的转换过程全部结束

参考资料
PhoneWindow.java
Android Context完全解析,你所不知道的Context的各种细节
详解Android View 绘制流程,Xml 文件到 View 对象的转换过程 转载https://www.codesocang.com/appboke/38360.html技术博客阅读排行
-

2016-09-10
-

使用C ++ 11线程支持库创建带有事件循环,消息队列和计时器的辅助线程
2020-09-14
-

快速集成MQTT协议到Android客户端,只需要简单的几个步骤,无需关
2016-09-22
-

2021-01-24
-

2020-12-20
-

2018-04-01
-
2020-08-02
-

2017-01-05
最新文章
-
React Native 启动速度优化――JS 篇【全网最全,值得收藏】
2021-04-19
-
2021-01-24
-
2020-12-20
-

2020-12-19
-
2020-09-14
-
使用C ++ 11线程支持库创建带有事件循环,消息队列和计时器的辅助线程
2020-09-14
-

2020-08-29
-
2020-08-09
热门源码
