创建Opencart的仪表盘模块
在本文中,我将演示如何创建Opencart的自定义的仪表板模块。仪表板模块提供发生的事情和实体店的统计信息的高级视图。虽然你会发现已经在核心本身的某些有用的仪表板模块,有时你想更具体的了解这是将要显示的信息。因此,你最终创建自定义的仪表板模块。
今天,我们将创建一个例子仪表盘模块,并将其与管理仪表板显示屏集成。为了简单起见,我们做出的最新客户块在商店可用。我们将使用最新版本Opencart的,我以为你熟悉Opencart的基本模块的开发过程。
什么是仪表板模块?
一旦你登录到Opencart的的后端,你会被重定向到屏幕,在这里你会看到类似“订单总数”,“总销售额”,“世界地图”等,这些块是块不同的仪表板模块,提供了有关在店里发生了什么有用的信息。任何一个仪表板模块的最常见的用途是提供一些统计数据。

从技术上讲,仪表板模块类似于Opencart的其它模块,并遵循相同的结构和约定任何Opencart的模块。但是,是什么让他们特别的是它们连接到后端的仪表盘上显示的方式。
因此,我们将与我们的定制仪表盘模块通常的自定义模块的开发过程开始。最后,我们会重视我们的模块到仪表板部分。
创建自定义仪表板模块
继续前进,建立一个文件管理/控制/仪表板/ recentcustomers.php包含以下内容。我们将使用recentcustomers作为我们的模块名称。
<phpclass ControllerDashboardRecentcustomers extends Controller { public function index() { $this ->load->language( 'dashboard/recentcustomers' ); $data [ 'heading_title' ] = $this ->language->get( 'heading_title' ); $data [ 'column_customer_id' ] = $this ->language->get( 'column_customer_id' ); $data [ 'column_customer_name' ] = $this ->language->get( 'column_customer_name' ); $data [ 'column_customer_email' ] = $this ->language->get( 'column_customer_email' ); $data [ 'column_date_added' ] = $this ->language->get( 'column_date_added' ); $data [ 'text_no_results' ] = $this ->language->get( 'text_no_results' ); $data [ 'recentcustomers' ] = array (); $this ->load->model( 'report/recentcustomers' ); $results = $this ->model_report_recentcustomers->getRecentCustomers(); foreach ( $results as $result ) { $data [ 'recentcustomers' ][] = array ( 'customer_id' => $result [ 'customer_id' ], 'name' => $result [ 'firstname' ] . ' ' . $result [ 'lastname' ], 'email' => $result [ 'email' ], 'date_added' => $result [ 'date_added' ] ); } return $this ->load->view( 'dashboard/recentcustomers.tpl' , $data ); }}
这是一个相当简单的控制器设置!这里要注意的重要一点是,我们正在加载的 recentcustomers模型并调用 getRecentCustomers方法来获取最近的客户。
让我们继续快速地建立在一个语言文件管理/语言/英文/仪表板/ recentcustomers.php。
<php// Heading$_ [ 'heading_title' ] = 'Recent Customers' ;// Text$_ [ 'column_customer_id' ] = 'Customer ID' ;$_ [ 'column_customer_name' ] = 'Customer Name' ;$_ [ 'column_customer_email' ] = 'Customer Email' ;$_ [ 'column_date_added' ] = 'Date Added' ;$_ [ 'text_no_results' ] = 'No customer(s) found.' ;再次,这只不过是设置将在图文件中所使用的标签的更多。
此外,在创建模型文件管理/模型/报告/ recentcustomers.php包含以下内容。
<phpclass ModelReportRecentcustomers extends Model { public function getRecentCustomers() { $query = $this ->db->query( "SELECT * FROM `" . DB_PREFIX . "customer` ORDER BY date_added DESC LIMIT 5" ); return $query ->rows; }}
在模型文件,我们定义了一个 getRecentCustomers方法,这将只是在店里取的五个最新的客户。
最后,我们将继续前进,创造在视图文件管理/视图/模板/仪表板/ recentcustomers.tpl。
<div class = "panel panel-default" > <div class = "panel-heading" > <h3 class = "panel-title" ><i class = "fa fa-users" ></i> <php echo $heading_title ; ></h3> </div> <div class = "table-responsive" > <table class = "table" > <thead> <tr> <td class = "text-right" ><php echo $column_customer_id ; ></td> <td><php echo $column_customer_name ; ></td> <td><php echo $column_customer_email ; ></td> <td><php echo $column_date_added ; ></td> </tr> </thead> <tbody> <php if ( $recentcustomers ) { > <php foreach ( $recentcustomers as $customer ) { > <tr> <td class = "text-right" ><php echo $customer [ 'customer_id' ]; ></td> <td><php echo $customer [ 'name' ]; ></td> <td><php echo $customer [ 'email' ]; ></td> <td><php echo $customer [ 'date_added' ]; ></td> </tr> <php } > <php } else { > <tr> <td class = "text-center" colspan= "6" ><php echo $text_no_results ; ></td> </tr> <php } > </tbody> </table> </div></div>在视图中,我们遍历客户记录,并在一个不错的,反应灵敏表格形式显示出来。
所以,这就是它只要我们的自定义模块而言!你应该已经注意到,这个程序是完全一样的,任何自定义模块的开发过程中。在下一节中,我们将看到我们的自定义模块将究竟如何连接到仪表板部分!
连接我们的模块控制板
为了我们的自定义模块连接到仪表板,我们将不得不改变了几个核心文件的后端。为了简便起见,我们将看看在核心文件所需的变化。说了这么多,你应该严格避免直接改变的核心文件,而使用OCMOD,它允许你做,在一个更好的方法。
来吧,打开管理/控制/普通/ dashboard.php在你喜欢的文本编辑器文件。找到$数据['最近'] = $这个- >负载>控制器(“仪表板/最近');片段,并添加仅次于该行下面的代码片段。
$data [ 'recentcustomers' ] = $this ->load->controller( 'dashboard/recentcustomers' )
它被用来初始化我们“最近客户”块。
此外,编辑位于文件管理/视图/模板/普通/ dashboard.tpl。找到<DIV CLASS =“COL-LG-8 COL-MD-12 COL-SM-12 COL-SX-12”> <PHP的echo $最近?; ?> </ DIV>在该文件片段和行之后添加以下代码。
<div class = "col-lg-8 col-md-12 col-sm-12 col-sx-12" > <php echo $recentcustomers ; ></div>所以,我们几乎做到了!现在,刷新你的仪表板,你应该能够看到一个非常漂亮的近期客户模块显示在下面的屏幕截图。

结论
今天,我们已经学会了如何创建Opencart的自定义的仪表板模块。这显示在店里的综合信息,并留意在店里发生了什么事情的好办法。
我们有很多扩展Opencart的的在市场上,这将有助于扩大你的实现超出了该平台还提供出的现成了。
我敢肯定,这将是对你有用,不要忘记分享您的意见和建议!
Web前端阅读排行
-
2016-06-07
-

2016-09-26
-
2016-09-26
-
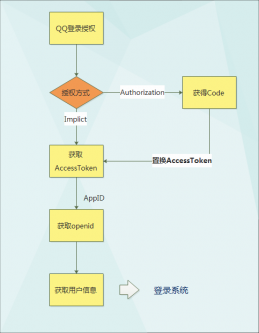
![[C#]QQ开放平台(QQ站外登录)_流程和源码示例](http://p1.codesocang.com/uploads/allimg/160926/160P23517-0-lp.png)
2016-09-26
-

2016-09-26
-
2016-09-26
-
-
ASN1.js是一个纯JavaScript库实现一个完整的BER ASN.1解码器
2016-02-17
最新文章
-
2022-03-13
-

2022-03-13
-
2022-03-10
-
2022-03-10
-
2022-03-09
-
2022-03-08
-
2022-03-07
-
2022-03-06
热门源码
