安卓:使用SQLite数据库实例教程
让我们来编写在Eclipse ADT +,它可以用来简单的Android应用程序:
- 创建SQLite数据库(在设备的内存)
- 创建一个简单的测试表
- 显示在数据库表中的列表,并允许我们选择一个表来显示和编辑
-
显示在表般的风格选定表(使用简单的DataGrid控件的基础上
TableLayout) - 独立表和数据库的结构的(是稳定的添加/删除新列,添加新的表与新的结构,等等)。
必要的工具
与Java和.NET桌面技术,Java在Android上不要求任何SQLite的第三方库,还有一个集成包-android.database.sqlite。
我们只需要Eclipse IDE的,在ADT插件和Android设备。文章中所有的代码可能会与任何Android操作系统版本兼容,并在2.3和4.1.2进行测试。
如何创建和结果
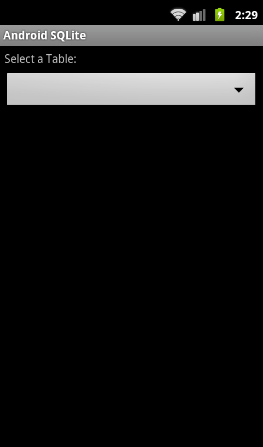
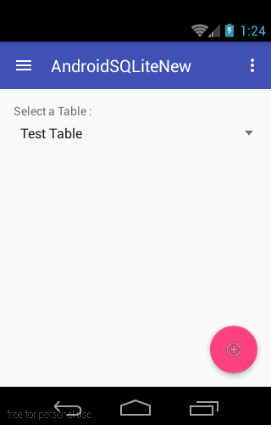
首先,创建一个空的活动一个普通的Android应用程序。和化妆的基本MainActivityGUI布局,像这样的:

<LinearLayout xmlns:android="http://schemas.android.com/apk/res/android"
    xmlns:tools="http://schemas.android.com/tools"
    android:layout_width="match_parent"
    android:layout_height="match_parent"
    android:orientation="vertical"
    android:padding="5dp" >

    <TextView
        android:id="@+id/textView1"
        android:layout_width="fill_parent"
        android:layout_height="wrap_content"
        android:text="Select a Table :" />

    <Spinner
        android:id="@+id/SpiTables"
        android:layout_width="fill_parent"
        android:layout_height="wrap_content"
        android:layout_marginTop="5dp" />

    <ScrollView
        android:id="@+id/scrollView1"
        android:layout_width="fill_parent"
        android:layout_height="fill_parent" >

        <TableLayout
            android:id="@+id/TblGrid"
            android:layout_width="fill_parent"
            android:layout_height="wrap_content"
            android:layout_marginTop="5dp" >

            <Button
                android:id="@+id/BtnAdd"
                android:layout_width="match_parent"
                android:layout_height="wrap_content"
                android:text="Add..." />
        </TableLayout>

    </ScrollView>

</LinearLayout>
-
Spinner是一个弹出框(combobox),它提供表的列表供用户选择。 -
TableLayout是一个GUI的容器,它允许任何控制表般的风格布置。 -
ScrollView提供了垂直滚动条TableLayout,其中,它的高度大于屏幕的高度。 -
Button允许用户添加新行,并显示在TableLayout所有行之后。
我们创建了一个GUI后,让我们创建DBHelper一流的基础上SQLiteOpenHelper,它将创建数据库,并为我们提供了访问它:
package com.example.androidsqlite;

import android.content.Context;
import android.database.sqlite.SQLiteDatabase;
import android.database.sqlite.SQLiteOpenHelper;
import android.widget.Toast;

public class DBHelper extends SQLiteOpenHelper {

    Context mContext;

    public DBHelper(Context context) {
        /* There you can create DB */
        super(context, "test.db", null, 1);
        mContext = context;
    }

    @Override
    public void onCreate(SQLiteDatabase db) {
        try {
            /* There you can create tables */
            db.execSQL("CREATE TABLE IF NOT EXISTS [Test Table] ("
                    + "id INTEGER PRIMARY KEY AUTOINCREMENT, "
                    + "'FirstName' TEXT, 'Age' INTEGER);");
        } catch (Exception ex) {
            Toast.makeText(mContext,
                    "Error in DBHelper.onCreate: " + ex.getMessage(),
                    Toast.LENGTH_SHORT).show();
        }
    }

    @Override
    public void onUpgrade(SQLiteDatabase db, int oldVersion, int newVersion) {
        try {
            /* There you should drop all created tables
               (fires on DB upgrade and next recreates all back) */
            db.execSQL("DROP TABLE IF EXISTS [Test Table];");
        } catch (Exception ex) {
            Toast.makeText(mContext,
                    "Error in DBHelper.onUpgrade: " + ex.getMessage(),
                    Toast.LENGTH_SHORT).show();
        }
    }
}
接下来,让我们补MainActivity类实现了OnClickListener和OnItemSelectedListener。
并得到一个表格清单combobox上的活动造成:
@Override
protected void onCreate(Bundle savedInstanceState) {
    super.onCreate(savedInstanceState);
    setContentView(R.layout.activity_main);

    try {
        /*
         * Initialize widgets
         */

        SpiTables = (Spinner) this.findViewById(R.id.SpiTables);

        TblGrid = (TableLayout) this.findViewById(R.id.TblGrid);

        BtnAdd = (Button) this.findViewById(R.id.BtnAdd);

        BtnAdd.setOnClickListener(this); /* MainActivity should implement OnClickListener */

        ArrayList<String> spinnerArray = new ArrayList<String>();

        /* Get Tables List To Array */

        DBHelper dbHelper = new DBHelper(this);

        Cursor c = dbHelper.getReadableDatabase().rawQuery_
        ("SELECT name FROM sqlite_master WHERE type='table'", null);

        if (c.moveToFirst()) {
            while ( !c.isAfterLast() ) {
                /* We can ignore the SQLite's reserved tables...
                 * ... or do not ignore them :)
                 * if (c.getString(0) == "android_metadata" ||
                 	c.getString(0) == "sqlite_sequence") {
                    c.moveToNext();
                    continue;
                }*/

                spinnerArray.add(c.getString(0));
                c.moveToNext();
            }
        }

        /* And Put This Array To Spinner */

        ArrayAdapter<String> spinnerArrayAdapter = new ArrayAdapter<String>
        (this, android.R.layout.simple_spinner_item, _
        spinnerArray); //selected item will look like a spinner set from XML
        spinnerArrayAdapter.setDropDownViewResource(android.R.layout.simple_spinner_dropdown_item);
        SpiTables.setAdapter(spinnerArrayAdapter);

        SpiTables.setOnItemSelectedListener(this); /* MainActivity should implement
                                                      OnItemSelectedListener */

    } catch (Exception ex) {
        Toast.makeText(this,
                "Error in MainActivity.onCreate: " + ex.getMessage(),
                Toast.LENGTH_SHORT).show();
    }
}
接下来,让我们来实现Activity的showTable方法,它会显示(或刷新)选择表中的网格:
public void showTable(String TableName) {
    try {
        /* Get Readable DB */
        DBHelper DB_Helper = new DBHelper(this);
        SQLiteDatabase db = DB_Helper.getReadableDatabase();

        /* Select All Table's Data */
        Cursor cur = null;
        cur = db.rawQuery("SELECT * FROM [" + TableName + "]", null);

        /* Clean TblGrid Up, excluding a last child, i.e. "Add" button */
        TblGrid.removeViews(0, TblGrid.getChildCount() - 1);

        cur.moveToPosition(0);

        /* Iterate All Columns And Create The Grid Header */

        TableRow tableHeader = new TableRow(this);

        TableColumns = new ArrayList<String>();

        for (int i = 0; i < cur.getColumnCount(); i++) {

            TextView columnHeader = new TextView(this);

            columnHeader.setBackgroundColor(Color.rgb(195, 195, 195));
            columnHeader.getBackground().setAlpha(20);

            columnHeader.setGravity(Gravity.CENTER_HORIZONTAL);

            columnHeader.setText(cur.getColumnName(i));

            columnHeader.setPadding(5, 5, 5, 5);

            tableHeader.addView(columnHeader);

            TableColumns.add(cur.getColumnName(i));
        }

        TblGrid.addView(tableHeader, 0);

        /* Iterate All Rows And Create The Grid Rows */

        for (int i = 0; i < cur.getCount(); i++) {

            TableRow tableRow = new TableRow(this);

            for (int j = 0; j < cur.getColumnCount(); j++) {
                EditText editText = new EditText(this);

                editText.setGravity(Gravity.CENTER_HORIZONTAL);

                editText.setText(cur.getString(j));

                editText.setPadding(5, 5, 5, 5);

                tableRow.addView(editText);
            }

            /* "Delete" Button */

            ImageView imgDel = new ImageView(this);
            imgDel.setImageResource(R.drawable.ic_delete); /* This icon is "Android Icon Set" Drawable */
            imgDel.setOnClickListener(this);
            imgDel.setTag(R.string.ButtonName, "BtnDelete");
            if (cur.getColumnIndex("id") >= 0) { /* Delete Button stores the row's id */
                imgDel.setTag(R.string.IdToDelete, cur.getInt(cur.getColumnIndex("id")));
            }
            tableRow.addView(imgDel);

            tableRow.setPadding(10, 10, 10, 10);

            TblGrid.addView(tableRow, TblGrid.getChildCount() - 1);

            cur.moveToNext();
        }

        /* Close all connections */
        cur.close();
        db.close();

        BtnAdd.setEnabled(true);
    } catch (Exception ex) {
        Toast.makeText(this,
                "Error in MainActivity.showTable: " + ex.getMessage(),
                Toast.LENGTH_SHORT).show();
    }
}

@Override
public void onItemSelected(AdapterView<> parent, View view, int position,
        long id) {
    TableName = parent.getItemAtPosition(position).toString();

    showTable(TableName);
}

@Override
public void onNothingSelected(AdapterView<> parent) {
    TblGrid.removeViews(0, TblGrid.getChildCount() - 1);
    BtnAdd.setEnabled(false);
}
接下来,创建一个AddRecordDialog类(出现添加按钮点击查询行单元格值对话框):
package com.example.androidsqlite;

import java.util.ArrayList;

import android.app.Dialog;
import android.content.Context;
import android.database.sqlite.SQLiteDatabase;
import android.os.Bundle;
import android.view.View;
import android.widget.Button;
import android.widget.EditText;
import android.widget.LinearLayout;
import android.widget.TextView;
import android.widget.Toast;

public class AddRecordDialog extends Dialog {

    LinearLayout LilRoot;

    Button BtnOK;
    Button BtnCancel;

    String mTableName;
    ArrayList<String> mTableColumns;

    public AddRecordDialog(Context context, String TableName,
            ArrayList<String> TableColumns) {
        super(context);

        mTableName = TableName;
        mTableColumns = TableColumns;
    }

    @Override
    protected void onCreate(Bundle savedInstanceState) {
        super.onCreate(savedInstanceState);
        setContentView(R.layout.dialog_add_record);

        try {

            this.setTitle("Add To: " + mTableName);

            LilRoot = (LinearLayout) findViewById(R.id.LilRoot);

            //

            for (int i = 0; i < mTableColumns.size(); i++) {
                if (mTableColumns.get(i).equals("id")) {
                    continue;
                }

                LinearLayout cellEditor = new LinearLayout(this.getContext());

                TextView cellHeader = new TextView(this.getContext());
                cellHeader.setText(mTableColumns.get(i));
                cellEditor.addView(cellHeader);

                EditText cellValue = new EditText(this.getContext());
                cellEditor.addView(cellValue);

                LilRoot.addView(cellEditor, LilRoot.getChildCount() - 1);
            }

            BtnOK = (Button) findViewById(R.id.BtnOK);
            BtnOK.setOnClickListener(new View.OnClickListener() {
                @Override
                public void onClick(View v) {

                    try {

                        DBHelper DB_Helper = new DBHelper(AddRecordDialog.this
                                .getContext());
                        SQLiteDatabase db = DB_Helper.getWritableDatabase();

                        String query = "INSERT INTO [" + mTableName
                                + "] ('";

                        for (int i = 0; i < mTableColumns.size() - 1; i++) {
                            if (mTableColumns.get(i).equals("id")) {
                                continue;
                            }

                            query += mTableColumns.get(i) + "', '";
                        }

                        query += mTableColumns.get(mTableColumns.size() - 1)
                                + "') VALUES ('";

                        for (int i = 0; i < LilRoot.getChildCount() - 2; i++) {
                            LinearLayout cellEditor = (LinearLayout) LilRoot
                                    .getChildAt(i);

                            EditText cellValue = (EditText) cellEditor
                                    .getChildAt(1);

                            query += cellValue.getText().toString() + "', '";
                        }

                        LinearLayout cellEditor = (LinearLayout) LilRoot
                                .getChildAt(LilRoot.getChildCount() - 2);

                        EditText cellValue = (EditText) cellEditor
                                .getChildAt(1);

                        query += cellValue.getText().toString() + "');";

                        db.execSQL(query);

                        AddRecordDialog.this.dismiss();

                    } catch (Exception ex) {
                        Toast.makeText(
                                AddRecordDialog.this.getContext(),
                                "Error in AddRecordDialog.onClick: "
                                        + ex.getMessage(), Toast.LENGTH_SHORT)
                                .show();
                    }
                }
            });

            BtnCancel = (Button) findViewById(R.id.BtnCancel);
            BtnCancel.setOnClickListener(new View.OnClickListener() {
                @Override
                public void onClick(View v) {
                    AddRecordDialog.this.dismiss();
                }
            });

        } catch (Exception ex) {
            Toast.makeText(this.getContext(),
                    "Error in AddRecordDialog.onCreate: " + ex.getMessage(),
                    Toast.LENGTH_SHORT).show();
        }
    }
}
而且它的XML UI标记:
<xml version="1.0" encoding="utf-8">
<LinearLayout xmlns:android="http://schemas.android.com/apk/res/android"
    android:id="@+id/LilRoot"
    android:layout_width="match_parent"
    android:layout_height="match_parent"
    android:orientation="vertical" >

    <LinearLayout
        android:layout_width="match_parent"
        android:layout_height="wrap_content"
        android:orientation="horizontal" >

        <Button
            android:id="@+id/BtnOK"
            android:layout_width="fill_parent"
            android:layout_height="wrap_content"
            android:layout_weight="1"
            android:text="OK" />

        <Button
            android:id="@+id/BtnCancel"
            android:layout_width="fill_parent"
            android:layout_height="wrap_content"
            android:layout_weight="1"
            android:text="Cancel" />

    </LinearLayout>

</LinearLayout>
最后,编写添加和删除按钮的逻辑:
@Override
public void onClick(View v) {

    try {
        if (v.getTag(R.string.ButtonName) == "BtnDelete") {
            int id = (Integer) v.getTag(R.string.IdToDelete);


            DBHelper DB_Helper = new DBHelper(this);
            SQLiteDatabase db = DB_Helper.getWritableDatabase();

            db.execSQL("DELETE FROM _
            [" + TableName + "] WHERE id = " + id + ";");

            showTable(TableName);

            return;
        }

        switch (v.getId()) {
        case R.id.BtnAdd:

            AddRecordDialog dlg = new AddRecordDialog(this, TableName,
                    TableColumns);
            dlg.setOnDismissListener(new OnDismissListener() {
                public void onDismiss(final DialogInterface dialog) {
                    showTable(TableName);
                }
            });
            dlg.show();

            break;
        }

    } catch (Exception ex) {
        Toast.makeText(this,
                "Error in MainActivity.onClick: " + ex.getMessage(),
                Toast.LENGTH_SHORT).show();
    }
}
手机开发阅读排行
-

安卓开发复习笔记――Fragment+FragmentTabHost组件(实现新浪微
2016-09-26
-

2014年最新720多套Android源码2.0GB免费一次性打包下载
2016-01-01
-

开源直播系统源码功能一览表(含ios+android+服务端+后台)
2019-10-24
-
2019-09-26
-
2019-09-12
-
2019-09-24
-

直播源码的崛起的巅峰:布谷一对一视频直播的蓬勃发展让您见证了
2019-09-25
-
2019-09-23
最新文章
-

2022-03-16
-
2022-03-16
-
Android开发使用WebView打造webapp示例代码
2022-03-16
-

2022-03-16
-
开源直播系统源码功能一览表(含ios+android+服务端+后台)
2019-10-24
-
2019-10-22
-
2019-09-26
-
直播源码的崛起的巅峰:布谷一对一视频直播的蓬勃发展让您见证了
2019-09-25
热门源码
